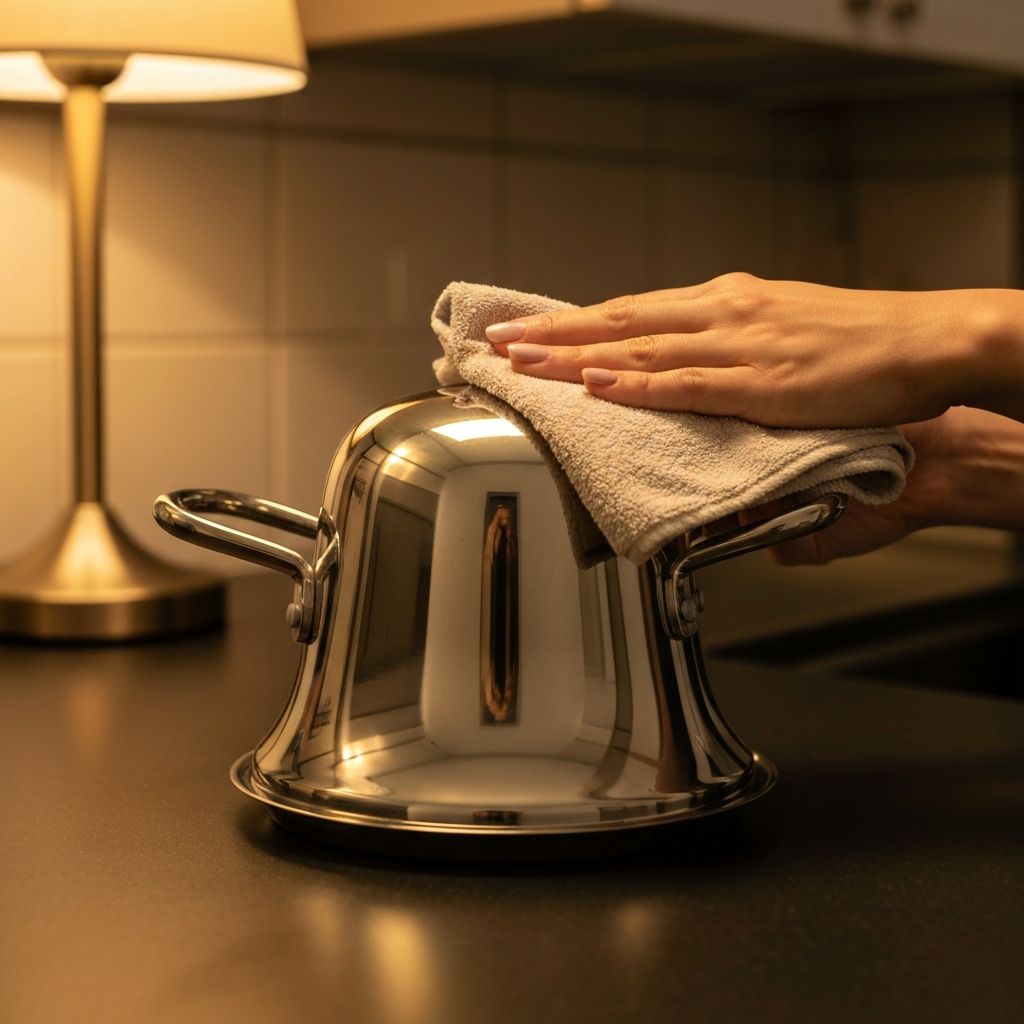
Polishing Belgique stainless steel cookware to a mirror finish — care and maintenance guide

The Complete Guide

Belgique Cookware
Care Guide

Premium cookware is a long-term investment. The difference between a Belgique pan that looks like new after ten years and one that is dull and scratched after two years is almost entirely care and maintenance. This guide covers everything you need to know.

Why Proper Care Matters

Protect Your
Investment

Belgique cookware is engineered to last decades with proper care. The mirror-polished stainless steel, the PFOA-free non-stick coatings, and the hard-anodized aluminum surfaces are all durable — but each material has specific care requirements that, when followed, extend functional life and preserve aesthetics almost indefinitely.

The most common causes of cookware degradation — rainbow staining on steel, peeling non-stick coatings, mineral deposit build-up, and scratched interiors — are all preventable. The fixes for most of these issues are inexpensive and take minutes. This guide is organized by material type and issue so you can find exactly what you need quickly.

A key principle across all Belgique surfaces: avoid the dishwasher. The combination of harsh alkaline detergents, hard water, and high-heat drying cycles is the single biggest source of premature cookware degradation. Two minutes of hand washing preserves finishes that twenty dishwasher cycles would destroy.

Section 01

Cleaning Stainless
Steel Cookware

Belgique's 18/10 stainless steel is among the most forgiving materials in home cookware — it will not rust, corrode, or react with food. With the right cleaning habits, the mirror polish will remain showroom-quality for the life of the pan.

01

Cool Before Washing

Always allow your stainless steel Belgique cookware to cool completely before washing. Submerging a hot pan in cold water causes thermal shock, which can warp the encapsulated aluminum base and compromise the pan's flat bottom — permanently affecting how it sits on a burner.

02

Hand Wash with Warm Soapy Water

For everyday cleaning, warm water and a few drops of mild dish soap with a soft sponge or microfiber cloth is all you need. The 18/10 stainless steel interior is non-reactive and easy to wipe clean. Avoid steel wool pads or abrasive scrubbers, which will scratch the mirror polish and create micro-grooves where food particles can accumulate.

03

Remove Rainbow Staining with Vinegar

The iridescent blue or rainbow discoloration that sometimes appears on stainless steel after high-heat cooking is caused by mineral deposits and oxidation — it is harmless but can be unsightly. Pour a small amount of white vinegar into the pan, warm gently, then wipe clean. The acidity dissolves the mineral film without damaging the steel. Rinse thoroughly afterward.

04

Tackle Burnt-On Food with Baking Soda

For stubborn burnt-on residue, fill the pan with enough water to cover the affected area, add 2–3 tablespoons of baking soda, and bring to a gentle simmer for 5–10 minutes. The alkaline solution loosens carbonized food from the steel surface. Allow to cool, then wipe away with a soft cloth. For extreme cases, Bar Keepers Friend powder applied with a damp cloth and rubbed in the direction of the grain restores the finish without scratching.

05

Dry Immediately and Thoroughly

Water left standing on stainless steel, particularly hard water, leaves white mineral spots on the polished surface. After washing, dry immediately with a clean microfiber cloth using circular motions. For the mirror-polished exterior, a final buff with a dry cloth restores the showroom shine and prevents water mark build-up over time.

06

Avoid the Dishwasher

While Belgique stainless steel is technically dishwasher-safe, repeated dishwasher cycles gradually dull the mirror-polished exterior due to the harsh detergents and high-heat drying cycles. The tempered glass lids are particularly vulnerable — the constant thermal cycling can weaken them over time. Hand washing takes under two minutes and preserves the finish indefinitely.

Stainless Steel — Quick Reference

DishwasherAvoidDulls mirror polish over time
Steel wool / abrasive padsNeverCreates permanent surface scratches
White vinegarRecommendedRemoves rainbow staining and mineral deposits
Bar Keepers FriendRecommendedRestores finish on heavily discolored pieces
Baking soda pasteRecommendedLoosens burnt-on food without scratching
Metal utensilsCautionUse only on the cooking surface, not the polished exterior

Section 02

Non-Stick
Surface Care

The PFOA-free non-stick coating on Belgique's Hard-Anodized collection is a high-performance polymer surface that, properly cared for, maintains excellent food release for years. Non-stick coatings require a slightly more protective approach than stainless steel but reward that care with effortless low-fat cooking and near-zero cleanup time.

The key threats to non-stick longevity are mechanical (scratches from metal utensils), chemical (harsh dishwasher detergents), and thermal (sustained overheating). Avoid all three and the coating will remain intact and functional for years of regular use.

01

Use Only Low to Medium Heat

Non-stick hard-anodized cookware performs best and lasts longest when used on low to medium heat. The PFOA-free coating on Belgique's hard-anodized range is designed for efficient low-heat cooking — the aluminum's superior thermal conductivity means food heats evenly without needing a high flame. Overheating an empty non-stick pan above 500°F can damage the coating and, in extreme cases, release fumes.

02

Hand Wash Only — Never the Dishwasher

For non-stick surfaces, the dishwasher is a definitive no. The combination of harsh alkaline detergents, high temperatures, and high-pressure water jets degrades the non-stick polymer coating rapidly, often within just a few months of regular use. Wash instead with warm water, a small amount of dish soap, and a soft sponge. The non-stick surface releases food effortlessly and rarely requires scrubbing.

03

Use Wood, Silicone, or Nylon Utensils Only

Metal utensils — spatulas, spoons, tongs — will scratch and score the non-stick coating even on the first use, creating visible damage and compromising the coating's integrity over time. Use only utensils rated safe for non-stick cookware: silicone, heat-resistant nylon, or wood. This single habit extends the functional lifespan of non-stick cookware by years.

04

Season the Surface Occasionally

Every few months, or after a particularly thorough cleaning, lightly season the non-stick surface to maintain its release properties. Wipe the clean interior with a very thin layer of high-smoke-point oil (avocado, refined coconut, or flaxseed) using a paper towel, then heat on low for one to two minutes. Wipe away the excess with a clean paper towel. This restores the micro-film of oil that the surface relies on for peak performance.

05

Clean While Still Warm (Not Hot)

Non-stick cookware is easiest to clean while the pan retains gentle warmth. Wait two to three minutes after cooking, then wipe the interior with a damp cloth or soft sponge. Most residue slides away instantly without any scrubbing. Only in the rare case of sticky caramelized sugars or egg proteins should you soak briefly before washing.

Do

  • +Use silicone, nylon, or wooden utensils
  • +Hand wash with mild soap and a soft sponge
  • +Cook on low to medium heat
  • +Season the coating every few months with a thin oil wipe
  • +Store with a pan protector between stacked pieces
  • +Clean while the pan is still slightly warm

Do Not

  • Use metal spatulas, tongs, or spoons
  • Put in the dishwasher — ever
  • Preheat an empty pan on high heat
  • Use cooking spray aerosols (they leave a sticky residue that degrades the coating)
  • Cut food directly in the pan with a knife
  • Stack without protection between pieces

Section 03

Heat Management
& Temperature Control

How you apply heat to Belgique cookware is as important as how you clean it. Correct heat use improves cooking results, prevents sticking, and extends the life of both stainless steel and non-stick surfaces. These four principles cover the most impactful habits.

Always Preheat Gradually

Place the pan on the burner before turning on the heat, then raise the temperature gradually to your target level. This distributes heat evenly through the base before food touches the surface and prevents localized overheating at the burner contact point — a common cause of warping in lesser cookware and discoloration in premium stainless steel.

Match Pan Size to Burner Size

Use a burner that is approximately the same diameter as the pan base. A burner that extends beyond the pan's base forces heat up the sides, which can discolor the exterior of stainless steel, heat handles excessively, and create uneven cooking temperatures. For the bell-shaped designs, the wide base means most standard large burners are a near-perfect match.

Medium Heat Is Almost Always Enough

Home cooks frequently overcook using unnecessarily high heat. Belgique's encapsulated aluminum base conducts and retains heat so efficiently that medium heat produces results equivalent to high heat on lesser cookware. Searing proteins, browning vegetables, simmering sauces — all are best done between medium and medium-high. Reserve true high heat for boiling water only.

Use Oil or Butter Before Heating (Non-Stick Excepted)

For stainless steel pans, always add a thin layer of cooking oil before the pan fully heats up. This prevents the 'protein sticking' phenomenon caused by the micro-textured steel surface at high temperatures. The simple test: a drop of water placed in a preheated stainless pan should bead and skitter across the surface ('Leidenfrost effect') — that is when the pan is at the correct temperature to add oil then food.

Section 04

Storage Tips
for Bell-Shaped Pots

The distinctive bell-shaped silhouette of Belgique cookware presents a slightly different storage challenge compared to straight-walled pots — the wider upper profile means pieces don't stack as compactly, and the polished exterior requires care to avoid contact scratches. These four storage principles keep every piece in showroom condition.

The good news: the bell shape is inherently beautiful enough to be displayed rather than hidden. A pot rack or open kitchen shelf turns your Belgique collection into a visual feature — which is exactly the design intent.

Properly stored Belgique cookware on a kitchen pot rack — maintaining the mirror finish through correct storage

Hang When Possible

The most protective storage method for Belgique cookware is a ceiling pot rack or wall-mounted rail. Hanging eliminates the risk of impact scratches entirely and keeps each piece immediately accessible. The bell-shaped silhouette looks particularly elegant when displayed on a rack — the cookware becomes part of the kitchen's visual identity.

Use Pan Protectors When Stacking

If stacking in a cabinet or drawer is necessary, always place a felt pan protector, silicone mat, or even a folded kitchen towel between each piece. The bell-shaped profile means the interior of a stacked pot is largely protected, but the exterior rim and bottom of the upper piece rests against the interior of the lower — without a protector, this contact point will gradually develop fine scratches.

Store Lids Separately or Inverted

Storing glass lids resting on the pot rim is fine for short-term, but for cabinet storage, either remove lids and store them vertically in a lid organizer, or invert them so they rest bowl-side-up inside the pot. This prevents the lid rim from bearing weight on the pot's interior surface and keeps the tempered glass free of impact stress.

Keep Handles Aligned

When stacking multiple pieces, rotate each pot so the handles are roughly aligned on the same side. This keeps the stack stable and reduces the chance of a tower of cookware toppling and sustaining impact damage. Nesting the bell-shaped pots in order from largest to smallest creates a naturally secure arrangement.

Section 05

Troubleshooting
Common Issues

Even with careful use, cookware problems do arise. Below are the six most commonly reported issues with premium stainless steel and non-stick cookware — along with their root causes and the most effective solutions.

01

Rainbow or Blue Discoloration on Stainless

Cause

Caused by overheating or high-mineral water. The chromium oxide layer on the steel reacts with heat and minerals to create this iridescent film. Completely harmless and cosmetic only.

Solution

Fill the pan with equal parts water and white vinegar. Bring to a gentle simmer, then remove from heat and allow to cool. Wipe with a soft cloth. For persistent discoloration, apply Bar Keepers Friend with a damp cloth, rub gently in the direction of the steel grain, then rinse immediately and thoroughly.

02

White Mineral Deposits or Water Spots

Cause

Hard water contains dissolved calcium and magnesium. When water evaporates from the surface of stainless steel, these minerals are left behind as chalky white deposits that dull the mirror finish.

Solution

Apply undiluted white vinegar directly to the affected area using a soft cloth. Leave for 30 seconds, then wipe away. For extensive scale build-up, simmer a solution of 1 part vinegar to 3 parts water in the pan, then wipe clean. Always dry cookware immediately after washing to prevent future deposits.

03

Burnt-On Grease or Food Residue

Cause

Carbonized food and polymerized oils form a dark, hardened layer that resists standard washing. This is most common after high-heat cooking without adequate oil, or when food is left in the pan after cooking.

Solution

Fill the pan with water to cover the residue, add 2–3 tablespoons of baking soda, and bring to a boil. Simmer for 10 minutes, then remove from heat and allow to cool. Most residue will lift easily. For truly stubborn carbonized deposits on stainless, a paste of Bar Keepers Friend and water left on the area for 1–2 minutes before scrubbing with a non-scratch pad works extremely well.

04

Food Sticking to Stainless Steel

Cause

Almost always caused by one of three things: the pan was not preheated sufficiently before adding food; food was added before the oil was hot enough; or the pan was moved before the food had time to naturally release from the surface.

Solution

Use the water-bead test: preheat the pan on medium, then drop a few water droplets in. If they sizzle away immediately, the pan is not hot enough. If they bead and dance across the surface (Leidenfrost effect), add your oil and wait 15–20 seconds before adding food. Do not move the food immediately — proteins in particular will release naturally once they have formed a sear crust. Patience is the fix.

05

Non-Stick Coating Peeling or Flaking

Cause

Non-stick coatings degrade when scratched by metal utensils, subjected to repeated dishwasher cycles, overheated consistently above 450–500°F, or cleaned with abrasive materials. Once the coating begins to peel, the pan should be replaced.

Solution

Prevention is the only real solution here. Use silicone or wooden utensils exclusively, hand wash only, cook on low to medium heat, and never use metal scourers. A pan that has begun to visibly flake should be retired — while modern PFOA-free coatings are safer than earlier formulations, ingesting flaking coating is not advisable.

06

Handles Becoming Loose Over Time

Cause

Belgique handles are double-riveted directly through the pan wall for maximum strength, but repeated high-heat use combined with the natural thermal expansion and contraction of the metal can, over years, slightly loosen the rivet-to-metal interface.

Solution

If you notice any movement in a riveted handle, cease using the pan until the handle is secure — a loose handle on a heavy pot filled with hot liquid is a safety risk. Check whether the rivets have protruded through the interior surface; if so, they can sometimes be re-peened with a metal punch to tighten the connection. If the handle is welded rather than riveted, the pan will need professional repair or replacement.

Ready to Cook with Belgique?

Cookware That Rewards
the Care You Give It

Belgique cookware is built for longevity. Follow this guide and your pans will perform at the same level in year ten as they did on day one. Browse the full collection on Amazon.